5A Adjustable Voltage Step-Down Module with Red LED Voltmeter
Check my rate
| Main centres: | 1-3 business days |
| Regional areas: | 3-4 business days |
| Remote areas: | 3-5 business days |
Product information
5A ADJUSTABLE VOLTAGE STEP-DOWN MODULE WITH RED LED VOLTMETER
Product information
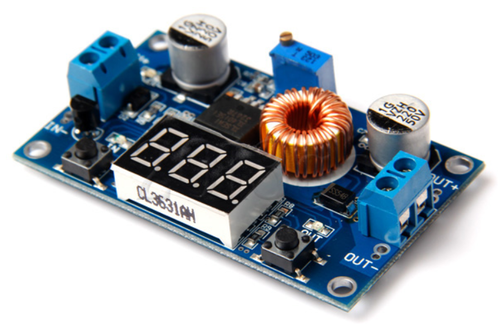
This is an XL4015, 180 kHz fixed frequency PWM buck converter, capable of driving a 5A load with high efficiency, low ripple and excellent line and load regulation. The module has a voltmeter to display the input and output voltages which are indicated by the state of the IN and OUT LED’s.
Specifications
Input voltage: 4-38V DC (Note: input voltage not to exceed 38V)
Output voltage: 1.25-36V DC (adjustable via the multi-turn preset)
Output current: 0-5A
Output power: 75W
Voltmeter range: 4 to 40V, error ±0.1V
Operating frequency: 180 kHz
High efficiency up to 96%
Built in thermal shutdown function
Built in current limit function
Built in output short protection function
Input reverse polarity protection: None (if required, insert an 8A diode in series with the input)
Size: 66 x 39 x 18mm
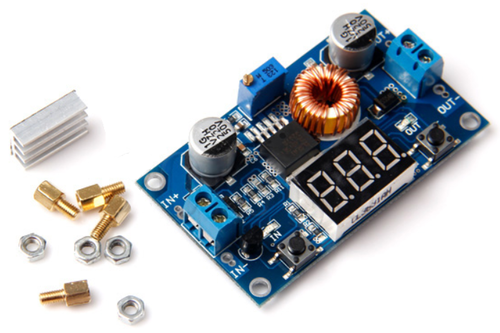
Package Includes
1 x 5A Adjustable Voltage Step-down Module with Red LED Voltmeter
1 x Heatsink with mounting hardware
Voltmeter Calibration Method
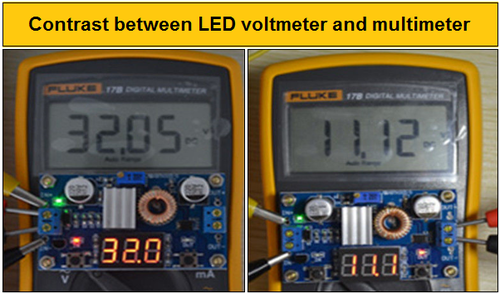
Output voltage display calibration
Step 1
Connect an accurate multimeter to the output side of the converter module in order to calibrate the display. Press the right button so that the word OUT is initially shown. The voltmeter now shows the output voltage. Hold down the right button for 2 or more seconds and then release it. The word OUT now flashes to indicate that you have entered the output voltage calibration mode.
Step 2
Press and release the right button to increment the voltage reading by 0.1V or press and release the left button to decrement the voltage reading by 0.1V.
Step 3
Hold down the right button for 2 or more seconds and then release it to exit the output voltage calibration mode. The calibration is saved.
Input voltage display calibration
Step 1
Connect an accurate multimeter to the input side of the converter module in order to calibrate the display. Press the right button so that the word IN is initially shown. The voltmeter now shows the input voltage. Hold down the right button for 2 or more seconds and then release it. The word IN now flashes to indicate that you have entered the input voltage calibration mode.
Steps 2 and 3
Follow steps 2 and 3 of the Output voltage calibration method.