DIY Hungarian Shelving

Hungarian shelving traditionally covers a large wall space and really looks impressive. But you don¿t need to buy expensive ready-made shelves; they are quite simple to make for the average DIY handyman or woman.

The whole essence of Hungarian shelves is structural simplicity, so the skills required are not beyond someone with reasonable ability. You don¿t need to make tricky joints or use fancy fastenings and the materials you need can be readily obtained.

So how do we make these marvels? First of all let¿s see what we need.

The basic design calls for a number of vertical lengths of timber, the exact sizes depend on how high and wide your shelves will be. These vertical supports should be spaced around 60cm apart and will need to be 5cm x 6cm. The length of each support is up to you.

The actual shelves can be made from a variety of materials. You can buy ready-made lengths of shelves made from particleboard, MDF or real timber, the choice is up to you. For a simple approach, you can choose a melamine coated particleboard which does not require painting.

Finally you¿ll need fasteners to hold the vertical supports to the wall. These will depend on your wall construction and can be wall plugs for plasterboard or concrete walls or screws for substantial timber walls. You should plan to space the fasteners around 60cm apart on the vertical supports.

Now lets see how we go about making these units.

Each shelf sits in a mortise cut in the vertical support. The cut needs to be the width of the thickness of the shelf and should be around 2/3 of the thickness of the support.

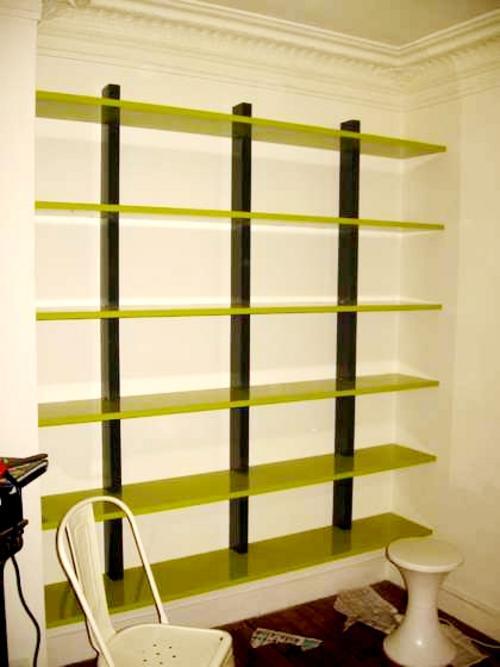
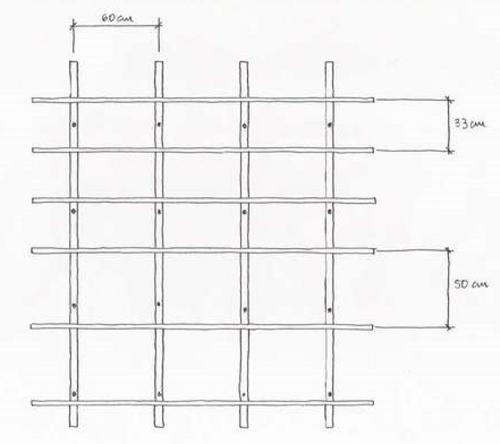
Make a corresponding mortise in the shelf to fit the mortise in the vertical support, so that when the shelf sits in the vertical support it fits flush with the wall against which the support is fastened.

The vertical spacing of your shelves is again a personal preference, but shelves tend to look better with a larger vertical space between the lower shelves. Make the mortises in each vertical support at the same position so that the shelves will be horizontal when fitted.

Fasten the vertical supports to the wall at the correct spacing, making sure that they are upright by using a spirit level. Then it¿s simply a case of slotting the shelves into the mortises in the vertical supports. As a final touch, you may need to insert small wedges under each shelf where it sits in the vertical supports to ensure that the shelves sit at right angles to the wall.


And that¿s about it! Now you can sit back and enjoy your handiwork!

View All Articles